Thursday, June 18, 2009

CSS Horizontal Menu (3)


Again this menu uses a background 1px image with a slight gradient for affect. Whats slightly different this time is I have an extra image the floats under each menu item depending on the page you are on. This is just a small triangular image. Both images are attached below the code.

In the body tag of each page you have to include which page you are on. For example, on the hompeage it would be body class="Home", on the contact page body class="contact" and so on..

CSS
#menubar {width:750px;margin: auto;background:url(../images/menu_shade.jpg) repeat-x left top;}
ul#menu { color:fff; font-size:14px;margin: auto; overflow:hidden; list-style:none; font-family:Helvetica, Arial, sans-serif;}
ul#menu li { float:left;margin:0 4px; height:29px; padding:6px 5px 5px 5px; }

ul#menu li a:link,
ul#menu li a:visited { text-decoration:none; font-weight:bold; color:#ffffff; }
ul#menu li a:hover,
ul#menu li a:focus { text-decoration:none; color:#363636;}

body.Home ul#menu li.Home,
body.About ul#menu li.About,
body.Qualifications ul#menu li.Qualifications,
body.Testimonials ul#menu li.Testimonials,
body.Contact ul#menu li.Contact { background:url(../images/nav_cur_bg_red.jpg) no-repeat center bottom; }

body.Home ul#menu li.Home a,
body.About ul#menu li.About a,
body.Qualifications ul#menu li.Qualifications a,
body.Testimonials ul#menu li.Testimonials a,
body.Contact ul#menu li.Contact a { color:#fff; }

HTML:
<div id="menubar">
<ul id="menu">
<li class="Home"><a href="index.html">Home</a></li>
<li class="About"><a href="about.html">About Us</a></li>
<li class="Qualifications"><a href="qualifications.html">Qualifications</a></li>
<li class="Testimonials"><a href="testimonials.html">Testimonials</a></li>
<li class="Contact"><a href="contact.html">Contact Us</a></li>
</ul>
</div>

CSS Horizontal Menu (2)


Using the same color scheme as CSS Horizontal Menu (1), I have decided to make a couple of changes. The first menu only had an under line as a mouse over action, this time we change the background of the menu.
Also, I have made this menu rounded and with a blue border, the last one had straight line borders.

Instead of a 1 px background 2 tone image as a background set to run across the width of the page, I have made the background, complete with border, 1 long image, and set this length to the width allocated for it in the page.

Other than that you'll see the code is quite similar to the previous menu.

Here is the css:
/* Menu */
#menu {height:31px;background:url(../images/background_menu.jpg) no-repeat;
width:760px;clear: both;}
#menu ul {list-style:none;}
#menu li {height:31px;display:block;float:left;
background:url(../images/submenu_divider.jpg) no-repeat right top;z-index:20;}
#menu li a {
font-family:Geneva, Arial, Helvetica, sans-serif;color:#266181;text-decoration:none;
font-size:12px;font-weight:bold;padding:8px 30px 6px 30px;display:block;}
#menu li a:hover {border-top:1px solid #6591ac;
background:#f8f8f8 url(../images/submenu_divider.gif) no-repeat right top;
padding:7px 30px 6px 30px;}

HTML:
<div id="menu">
<ul>
<li><a href="index.html">Home</a></li>
<li><a href="mission.html">Mission</a></li>
<li><a href="testimonials.html">Testimonials</a></li>
<li><a href="services.html">Services/Fees</a></li>
<li><a href="contact.html">Contact</a></li>
</ul>
</div>

CSS Horizontal Menu (1)


Whoa, I've been busy lately so this is my first post in 2 months. I'll put up a couple of horizontal menus I used recently on a few different websites.

This menu is css driven - by a unordered list (as most menus will be on this blog). I use images for background sometimes, but making sure that adding a new menu item at a later date is adding 1 line to the list, instead of having to create on/off images.

There are two images used for
a) the shaded background
b) the item divider,

Here is the css, html and the images are included too.

/** Horizontal Menu **/
#menu {display:block;width:975px;margin:auto; }
#menu ul {list-style:none;background:url(../images/background_menu.jpg) repeat-x;
height:35px;margin:0;padding:0 0 0 10px;font-size:15px;}
#menu ul li {margin-top:2px;float:left;padding:3px 15px 0 15px;background:url(../images/menu_divider.jpg) no-repeat right top;}
#menu ul li a{text-decoration:none;color:#171a29;}
#menu ul li a:hover{text-decoration:underline;}

HTML:
<div id="menu">
<ul>
<li><a href="">Home</a></li>
<li><a href="">About</a></li>
<li><a href="">Services</a></li>
<li><a href="">Events</a></li>
<li><a href="">Advertising</a></li>
<li><a href="">Contact Us</a></li>
<li><a href="">Directions</a></li>
</ul>
</div>

Images

Tuesday, March 24, 2009

CSS Hidden Div (4)


This post is a slight variation, but more of a compliment to CSS Hidden Div (3). I use the exact same js and expand/collapse images, but its a little less css. I've also included it in the little portlet I created last month. Code for that is contained in the Portlets in CSS (1) post.

As you can see its simply a list of contacts collapsed by default and you can expand or collapse as many as you like at a given time. You can get the images in the above posting.

Here is the html
<div class="contacts">
<div class="contacticon">
<img src="images/icon_expand.gif" id="toggle_icon1" name="toggle_icon1" width="11" height="11" border="0" onclick="toggleDisplay('contact1','toggle_icon1');">
</div>
<div class="contactname">Conor Cassidy</div>
<div id="contact1" class="contactinfo">
Web Designer<br />
(555) 555-1234<br />
<a href="mailto:conorcass@hotmail.com">conorcass@hotmail.com</a>
</div>
<br clear="all"/>
<div class="contacticon">
<img src="images/icon_expand.gif" id="toggle_icon2" name="toggle_icon2" width="11" height="11" border="0" onclick="toggleDisplay('contact2','toggle_icon2');">
</div>
<div class="contactname">John Doe</div>
<div id="contact2" class="contactinfo">
-- content --
</div>
<br clear="all"/>
etc
</div>
Here is the css:
.contacts {color:#000000;font-family:arial;font-size:12px;}
.contacticon {float:left;background-color: #ffffff;}
.contactname {float:left;width:200px;background-color: #ffffff;line-height:24px;
margin-top:-2px;}
.contactinfo {background-color: #ffffff;padding-left:21px;display:none;}
Here is the js:
function toggleDisplay(a,b) {
if (document.getElementById(a).style.display=='none' || document.getElementById(a).style.display=='' ) {
document.getElementById(a).style.display='block';
document.getElementById(b).src='images/icon_collapse.gif';
} else {
document.getElementById(a).style.display='none';
document.getElementById(b).src='images/icon_expand.gif';
}
}

Friday, March 20, 2009

CSS Hidden Div (3)

Fig 1:

Fig 2:
Here is an example of collapsing and hiding a div that I like to use a lot. It uses a few gifs that are seen across many sites and applications, and its a great effect that suits a variety of needs, such as FAQ's or instructions.
Like the example CSS Hidden Div (2), we begin with a default displayed div, with a hidden div below that. However, to create the above effect, everything is contained in an outer div that, when collapsed(again default) has a white background (invisible), but when expanded, it creates a nice effect.
Fig 1 is the what the user sees when the page is loaded, while fig 2 is what is shown when you click the plus sign to expand.
Using a simple onclick javascript method, I just pass in the parameters to change the icon from + to -, and to show the 2 divs - 1 as a background, and 1 as the content to reveal. At the bottom of this post I include the 3 gifs I use as the expand/collapse triggers.

Here is the html:
<div id="bkgd1" class="faqs">
<div class="faqicon"><img src="images/icon_expand.gif" id="toggle_icon1" name="toggle_icon1" width="11" height="11" border="0" onclick="toggleDisplay('faq1','bkgd1','toggle_icon1');" /></div>
<div class="faqcontent">
<div class="faqquestion">Lorem ipsum dolor sit amet, consectetur adipiscing elit?</div>
<!-- COLLAPSABLE AREA DEFINED HERE WITH DIV TAG -->
<div id="faq1" class="faqanswer"> --Latin Text--
<div class="faqbottom"><img src="images/icon_collapse2.gif" onclick="toggleDisplay('faq1','bkgd1','toggle_icon1');" /></div>
</div>
</div>
<br clear="all" />
</div>
Here is the css:
.faqs {padding:10px;background-color:#ffffff;margin-bottom:3px;}
.faqicon {float:left;padding:3px 10px 0 0;}
.faqcontent {float:left;width:750px;}
.faqquestion {font-size:14px;color:#395f97; font-weight:bold;}
.faqanswer {display:none;padding-top: 10px;}
.faqbottom {float:right;padding-top:10px;}
Here is the js:
function toggleDisplay(a,b,c) {
if (document.getElementById(a).style.display=='none' || document.getElementById(a).style.display=='' ) {
document.getElementById(a).style.display='block';
document.getElementById(b).style.backgroundColor='#f5f5f5';
document.getElementById(c).src='images/icon_collapse.gif';
} else {
document.getElementById(a).style.display='none';
document.getElementById(b).style.backgroundColor='#ffffff';
document.getElementById(c).src='images/icon_expand.gif';
}
}


Thursday, March 19, 2009

CSS Tables (3)


While trying to avoid using tables for layout, I do admit to cheating the odd time to get the job done, (I used to do it a lot more). So after using tables for so long, when I actually need a table for data purposes, I had forgotten about captions, grouping rows and columns, and defining header classes, rows etc. Here is a neat example using all of these attributes. Needless to say I didn't spend too much time on making it really fancy, but the different colors illustrate the features

1) Caption - obvious
2) Defining the col groups
I originally defined 2 colgroups, 1 for teams and 1 for content. In any colgroup, you can single out individual 'col's, that overrides the settings for the overall group. This part is bolded in the html sample below.
3) I included the thead reference to give the header colums the same color as the teams colgroup. If that was not included, the red and green colors would extend to the top.
4) For the border, I used the rules attribute. I set it to just show the border between the colgroups, you can see how changing this attribute, using all its values can effect the look and feel in the post CSS Tables (2)

Here is the html (I removed the data for space):
<table class="league" cellspacing="0" rules="groups">
<caption align="top">Premier League Table</caption>
<colgroup class="teams"/>
<colgroup span="5" class="content">
<col span="4"/>
<col class="totals"/>
</colgroup>

<thead class="header">
<tr>
<td> </td>
<td>P</td>
<td>W</td>
<td>D</td>
<td>L</td>
<td>Total</td>
</tr>
</thead>
<tbody>
<tr>
---content---
</tr>
</tbody>
</table>

Here is the css:
.league caption {font-weight:bold;padding-bottom:5px;}
.league td {padding:4px 10px;}
.teams {background-color:#b3bed0;}
.content {background-color:#84d5ac;}
.totals {background-color:#ba0401;}
.header {text-align:center;background-color:#b3bed0;}
tbody {text-align:center;}

CSS Tables (2)

Here are a few alternate versions of the table in the posting CSS Tables (3). Simply by changing the rules attribute you can change which borders are displayed.

For example, rules="rows":

rules="cols":

rules="all":

rules="none":

Monday, March 16, 2009

Rounded Corners


For the first of the rounded examples I'll be posting to this blog, I'll go with the easiest. This is recommended for a quick fix, if you have content that is not dynamic and that you are confident will not need to grow. Also, as you'll want it to work in all browsers, you will want to watch the spacing.
I'll do the example with 3 differnet colors to cover all bases you may have:
1) The background of the rest of the page
2) The border color for the rectangle
3) The color of the internal rectangle

All you do is create this image in photoshop, and set it as your background for a div or table.

Here are instructions how to make the above image in photoshop:

1) open a new file in Photoshop
2) fill the background in the light grey color
3) from the tool box, choose the Rounded Rectangle Tool
4) Define the Radius # while the tool is selected, e.g. 8 px
5) Use the white color for drawing the rounded rectangular box
6) Select the rounded rectangular box (Click ctrl while mousing over layer thumbnail in the layer palatte
7) Add a new layer
- You should see the black dashed line around the rectangle
8) go to Edit > Stroke > fill in the darker grey border color.

Thats it

Saturday, March 14, 2009

CSS Hidden Div (2)


The first example I posted to hide a div using javascript and css, was a href link and can be seen here. This time I will use an image, and the image will also change to denote that the div should be expanded/collpased. As you can see from the other example, I'll keep the exact same code for hidding/showing the div. The additional step this time is to use the getElementById tag to dynamically change the source of the image.
So the additional parameter I send in the javascript method is the id of the image to change. The tricky part is when you grab the image source, you get the full path. This is not ideal for code you want to work across all environments, so the best option here is when you grab the full source, to split it up and just use the 'images/arrow-right.jpg' part of the string.
The split method creates an array of the objects that are separated by '/' in the url, therefore I just need to grab the last 2 array elements and insert a / to reconstuct the shortened url.

<script language="javascript">
function switchDiv(divId, arrowId) {

if ( document.getElementById(divId).style.display != 'none' ) {
document.getElementById(divId).style.display = 'none';
}
else {
document.getElementById(divId).style.display = 'block';
}
var imagePath = document.getElementById(arrowId).src
var splitPath = imagePath.split("/");
var path = splitPath[splitPath.length-2] + '/' + splitPath[splitPath.length-1];
if ( path != 'images/arrow-right.jpg' ) {
document.getElementById(arrowId).src = 'images/arrow-right.jpg';
}
else {
document.getElementById(arrowId).src = 'images/arrow-down.jpg';
}
}
</script>

Here is the call in the HTML:
<div class="title">
<a href="javascript:switchDiv('arrangements', 1)"><img id="1" src="images/arrow-down.jpg"/></a> Title
</div>
<div id="hiddendiv">
<table style="border:1px solid black; margin-left:10px;">
<tr><td>Div is now showing</td></tr>
</table>
</div>

Saturday, March 7, 2009

CSS Tables (1)


Here is a simple css table, I have more complicated tables that I'll be uploading shortly. The main point to get across here is the border:collapse style - this means when we have a border for the rows and columns we do not have the little white space between each of them. Due to the size of the screen shot it may be hard to tell but the colum headers (th) have a background-image and if the collapse style was not set, this background would not be fluid across the top of the table

I have also include the shade image at the bottom of this post.
Here is the css:

#listings {border:1px solid #620a0b;border-collapse:collapse;}
#listings th {background-image: url(../images/shade.jpg);color:#ffffff;}
#listings td {border:1px solid #620a0b;padding:13px;color:#373b44;}
#listings td img {border:0px;}
#listings td a {text-decoration:none;color:#373b44;font-size:.9em;}
#listings td a:hover {text-decoration:underline;}

Here is the (shortened)html:

<table id="listings" width="95%">
<tr><th>Address</th><th>Details</th><th>Image</th></tr>
<tr align="left" valign="top"><td><b>50 Fell St (for lease)</b></td>
<td>17,707 Sq. Ft. Available for Lease $1.50 Industrial Gross <br /><a href="#"><img src="images/adobe_reader_20.jpg" style="float:left;"/></a><div style="float:left;margin-left:2px;"><a href="">Download PDF (253k)</a></div></td>
<td><img src="images/test_1.jpg"/></td>
</tr>
</table>
Here is the background image:

Dashed Border


This is really simple, but I wanted to just add it more as a companion post to CSS Tables (1) because it was used in the same webpage. This little box has a dashed border just to differentiate it from the main table that has the listings. The box has the same background color and border color, however the dashed effect and the bolded text just set it a little out so that the user recognizes its a unique message.

Here is the css:
#listingsMessage {
border:1px dashed #650b0b;
width:625px;
padding:10px;
color:#373b44;
font-weight:bold;
font-size:13px;
}

Here is the html:
<div id="listingsMessage">
-- text --
</div>

Wednesday, March 4, 2009

CSS Hidden Div

Fig 1 (Click to Enlarge)

Fig 2 (Click to Enlarge)

I got a request to do a little hidden div that would appear (and push the rest of the content down) just like it works now in gmail when you click the show search options link.

Its really just a case of setting the div style display to 'none' and calling a javascript method to switch it to 'block'.

Don't forget if you want to toggle between visibility of the item (without moving other content on the page) you would use visibility:hidden|visible.

So here is the link and javascript call from Fig1.
<a href="javascript:showOptions()">Show Search Options</a>
<script language="javascript">
function showOptions() {
document.getElementById("searchOptions").style.display='block';
document.getElementById("searchOptionsTitle").style.display='block';
}
function hideOptions() {
document.getElementById("searchOptions").style.display='none';
document.getElementById("searchOptionsTitle").style.display='none';
}
</script>
Fig 2 is initially hidden and once Show Search Options is clicked, it appears.
Here is the css:
#searchOptions {
display:none;
border:3px solid #77db81;
background-color:#b7edbc;
margin:0 10px 20px 10px;
padding:5px;
}
#searchOptionsTitle {
display:none;
margin:10px 10px 0 100px;
border-top:3px solid #77db81;
border-left:3px solid #77db81;
border-right:3px solid #77db81;
background-color:#77db81;
font-weight:bold;
line-height:20px;
}
Here is the html:
<div id="searchOptionsTitle">
Search Options
<div style="float:right;font-size:11px;line-height:20px;margin-right:5px;">
<a href="javascript:hideOptions()">Hide Search Options</a>
</div>
</div>
<div id="searchOptions">
<!-- Add components in a table -->
</div>

Sunday, March 1, 2009

CSS Buttons


Here is a simple way to make your buttons through css so that they can use the overall look and feel of your site - without having to use photoshop.

Again I am taking advantage of the customized list option, so this is especially useful if you are doing UI for an application with multiple pages/buttons. Play around with colors, border colors and margins as you need to suit your site. Of course, you could always use a background image with a gradient to make it even more stylish - See the Portlets in CSS (2) example of how I use a background image with gradient.

Here is the CSS
#button {
list-style-type: none;
margin: 0;
padding: 0;
}
#button LI {
display:block;
float:left;
font-weight: normal;
text-align: center;
}
#button LI A {
color: #4f6b72;
font-size: 11px;
font-weight:bold;
font-family: arial, helvetica, sans;
text-decoration: none;
border: 1px solid #4f6b72;
padding: 5px 15px 5px 15px;
margin: 0 0 10px 0;
background-color: #cae8ea;
}
#button LI A:hover, #button2 LI A:active {
background-color: #4f6b72;
font-weight:bold;
color:#ffffff;
text-decoration: none;
}

Here is the list:
<ul id="button">
<li><a href="">Submit</a></li>
<li><a href="">Reset</a></li>
</ul>

Friday, February 27, 2009

CSS 2 Column Layout


This is based on the CSS 3 Column layout I published earlier tonight so please refer to that posting for any special instructions. The only difference is the center col stretches across the rest of the page. Obviously by simply changing the widths you could have the small column on the right hand side of the page.

The css is identical to the other example save the 3rd column and the width of column 2, here is the code again:

(1 thing I didnt include in the other example was the css for the shade and the header - The shade is just a div of a 1x7 pixel image set to the background to create a shade effect. An example of this can be seen on the page Background Shade Effect on pages )

.header {
width:100%;
background-color:#ffffff;
height:50px;
text-align:center;
}
.banner {
padding:5px;
}
.shade {
background-image: url(../images/shade_gray.jpg);
line-height:7px;
}
#container {
width:100%;
padding:0px;
text-align:center;
}
#left {
width:20%;
padding-left:5px;
margin:10px 0 0 10px;
float:left;
text-align:center;
background-color:#ffffff;
height:450px;
}
/* Content Area */
#main {
float:left;
overflow: auto;
width: 75%;
background-color:#DEE2EA;
margin: 10px 15px 15px 15px;
font-family: Tahoma, Verdana, Geneva, sans-serif;
font-size: 12px;
text-align:center;
background-color:#ffffff;
height:450px;
}

and the html:
<div class="header">
Header/Banner goes here
</div>
<div class="shade"> </div>

<div id="container">
<div id="left">
Col 1
</div>

<div id="main">
Col 2
</div>

CSS 3 Column Layout


Using div only, here is a simple way to get a 3 column layout with a div on top for the header or banner. Please note here I have just given certain styles (white background, black border, 450px height etc) to highlight the columns. To make this page look good, you could build it out with css portlets like Portlets in CSS (1) or Portlets in CSS (2)

The basic idea (after the header div) is to create a container div, and then add the 3 columns at your desired width, all set to float:left;. Here is the css:

#container {
width:100%;
padding:0px;
text-align:center;
}
#left {
width:20%;
padding-left:5px;
margin:10px 0 0 10px;
float:left;
text-align:center;
background-color:#ffffff;
height:450px;
border:1px solid #000000;
}
#center {
float:left;
overflow: auto;
width: 55%;
margin: 10px 15px 15px 15px;
text-align:center;
background-color:#ffffff;
height:450px;
border:1px solid #000000;
}
#right {
width:20%;
padding:0px;
float:left;
margin-top:10px;
text-align:center;
background-color:#ffffff;
height:450px;
border:1px solid #000000;
}

Here is the html:

<div class="commercialHeader">
Header/Banner goes here
</div>
<div class="shade"> </div>
<div id="container">
<div id="left">
Col 1
</div>
<div id="center">
Col 2
</div>
<div id="right">
Col 3
</div>
</div>

Thursday, February 26, 2009

Background Shade Effect on Pages


Many of the sites you see nowadays that are center aligned, have a nice little shade effect between the over all background color and the background color for the content. You can see what I mean in the screen shot. This effect is very simple to accomplish.
In photoshop, create an image 1 pixel in height and variable width depending on how wide you want the content section. In this example my overall width is 936 pixels - 36 pixels either using a gradient between 2 shades of dark green. Once you set this as a background in a div, set to repeat-y and it will repeat as your page grows. I have included the bg image at the bottom of this post.(update - getting repeated errors trying to upload, so ping me if you need a copy)

Here is the css

#topbar {
line-height:15px;
background:#416845;
width:100%;
}

#background {
width: 936px;
margin: auto;
background-image: url(../images/background2.jpg);
background-repeat: repeat-y;
}

#container {
width: 864px;
margin: auto;
background-color: #eae5c5;
}

Here is the html
<div id="topbar"><br /><br /></div>
<div id="background">
<div id="container">
<!-- Content -->
</div>
</div>

Wednesday, February 25, 2009

Vertical CSS Menu with Multiple Submenus


When using customized lists to build menus it allows you to easily create submenus. The css is this example is quite long winded as it goes 5 deep. There are a couple of smaller vertical menus on this blog if you prefer an example with 1 or no submenu.

The styles I used to differentiate the 5 menus were
1 - Different Background Color, Bold Text
2 - Bold Text
3 - Regular Text
4 - Regular Text, Indent
5 - Smaller Text, Further Indent

Heres the CSS - whitespace removed
/* Begin Vertical Menu with 4 submenus*/

#vertmenu {height:400px;background-color:#e9ebef;width: 165px;padding: 0px;}

#vertmenu ul {list-style: none;margin: 0px;padding: 0px;border: none;}

#vertmenu ul li {margin: 0px;padding: 0px;}

#vertmenu ul li a {display: block;padding: 5px 0px 2px 5px;text-decoration: none;color: #3c444f;width:160px;font-weight:bold;background-color:#e9ebef;}

#vertmenu ul li a:hover, #vertmenu ul li a:focus {color: #ffffff;background-color: #98abc8;}

/* SubMenu 1 */
#vertmenu li li a:link, #vertmenu li li a:visited {font-weight: normal;background-color:#ffffff;padding: 2px 0 3px 5px;color: #3c444f;font-weight:bold;width:160px;}

#vertmenu li li a:hover {padding: 2px 0 3px 5px;color: #ffffff;background-color: #98abc8;width:160px;font-weight:bold;}

/* Submenu 2 */
#vertmenu li li li a:link, #vertmenu li li li a:visited {font-weight: normal;background-color:#ffffff;padding: 2px 0 3px 5px;color: #3c444f;width:160px;}

#vertmenu li li li a:hover {padding: 2px 0 3px 5px;color: #ffffff;background-color: #98abc8;width:160px;}

/* Submenu 3 */
#vertmenu li li li li a:link, #vertmenu li li li li a:visited {font-weight: normal;background-color:#ffffff;padding: 2px 0 3px 20px;color: #3c444f;width:145px;}

#vertmenu li li li li a:hover {padding: 2px 0 3px 20px;color: #ffffff;background-color: #98abc8;width:145px;}

/* Submenu 4 */
#vertmenu li li li li li a:link, #vertmenu li li li li li a:visited {font-weight: normal;background-color:#ffffff;padding: 2px 0 3px 40px;font-size:11px;color: #3c444f;width:125px;}

#vertmenu li li li li li a:hover {padding: 2px 0 3px 40px;color: #ffffff;font-size:11px;background-color: #98abc8;width:125px;}

/* End Vertical Menu with 4 Submenus */

Here is the html

<div style="background-color:#cccccc;padding:3px;width:165px;">
<div id="vertmenu">
<ul>
<li><a href="">Menu 1 (bold+bg)</a>
<ul>
<li><a href="">Menu 2 (bold)</a>
<ul>
<li><a href="">Menu 3 (reg)</a>
<ul>
<li><a href="">Menu 4 (indent)</a>
<ul>
<li><a href="">Menu 5 (indent, sm)</a></li>
<li><a href="">Menu 5</a></li>
<li><a href="">Menu 5</a>
<li><a href="">Menu 5</a></li>
</ul>
</li>
<li><a href="">Menu 4 »</a></li>
</ul>
</li>
<li><a href="">Menu 3</a></li>
</ul>
</li>
<li><a href="">Menu 2 »</a></li>
</ul>
</li>
<li><a href="">Menu 1</a></li>
</ul>
</div>
</div>

Simple CSS Vertical Menu with Submenu


Using the exact same code and background image from Simple CSS Vertical menu with images, I have added a small indented submenu. I will not repost the whole code, just that of the submenu. Click link above to see how the original vertical menu was created.

Things to note here are adding a background color again to override the background image from the main menu, and the padding to shift the submenu 20px to the right.

For an image free vertical menu with multiple submenus check out Vertical CSS Menu with multiple submenus.

/* subMenu */
#vertmenu li li a:link, #vertmenu li li a:visited {
font-weight: normal;
background:#e9ebef;
padding: 2px 0 3px 25px;

color: #3c444f;
width:135px;
}

#vertmenu li li a:hover {
padding: 2px 0 3px 25px;
color: #ffffff;
background-color: #48505b;
width:135px;
}

Here is the html, what has changed here, is that you need to embed the submenu, as a new list in the <li> element of the first list

<div style="clear:both;width:160px;background:#e9ebef;height:200px;">
<div id="vertmenu">
<ul>
<li><a href="">Home</a> </li>
<li><a href="">About</a></li>
<li>
<a href="">Events</a>
<ul id="submenu">
<li><a href="#">» Event 1</a></li>
<li><a href="#">» Event 2</a></li>
<li><a href="#">» Event 3</a></li>
</ul>
</li>
<li><a href="">Gallery</a></li>
<li><a href="">Contact</a></li>
<li><a href="">Site Map</a></li>
</ul>
</div>
</div>

Simple CSS Vertical Menu with Images


Firstly to clarify the image is only for a background hover over/hover out effect, not for the text of the menu item, therefore only 2 images are required. I have attached them to this posting.

The menu is vertical and quite basic, I will use the same style for Vertical Css Menu with Multiple Submenus. I'll also add a submenu to this one - Simple Css Menu with Submenu.

First the css: Make sure to set the list style to none, and then the ensure the li element's display is set to block.

#vertmenu {
font-size:13px;
width: 160px;
padding: 0px;
}

#vertmenu ul {
list-style: none;
margin: 0px;
padding: 0px;
border: none;
}

#vertmenu ul li {
margin: 0px;
padding: 0px;
}

#vertmenu ul li a {
display: block;
padding: 3px 0px 2px 20px;
text-decoration: none;
color: #3c444f;
width:140px;
font-weight:bold;
background:url(../images/menu_background_off.jpg) no-repeat;
}

#vertmenu ul li a:hover, #vertmenu ul li a:focus {
color: #ffffff;
background:url(../images/menu_background_on.jpg) no-repeat;
}

Here is the html
<div style="clear:both;width:160px;background:#e9ebef;height:160px;">
<div id="vertmenu">
<ul>
<li><a href="">Home</a></li> </li>
<li><a href="">About</a></li>
<li><a href="">Events</a></li>
<li><a href="">Gallery</a></li>
<li><a href="">Contact</a></li>
<li><a href="">Site Map</a></li>
</ul>
</div>
</div>


Tuesday, February 24, 2009

Portlets in CSS (2)


Following on from the first css portlet I did, here is one in which I use a background image as the title bar.

I also include an image and a customized list. I wont include the css for that as I basically reuse the style from How to Customize lists using css with a different image.

The main thing to note here is the image is only 1 pixel wide and is set to repeat horizontally across the background (bolded). I just create the image in photoshop with a gradient.

.contentTitle {
clear:left;
padding-left:5px;
font-size:15px;
font-weight:bold;
line-height:29px;
color:#ffffff;
background:url(../images/shade_blue.jpg) repeat-x;
}

.contentPanel {
background-color:#ffffff;
color:#6c6d71;
padding:10px;
border-left:1px solid #3a5f96;
border-right:1px solid #3a5f96;
border-bottom:1px solid #3a5f96;
}

Here is the (shortened)html. For the screenshot effect, it needs to be in a container approx 500px wide:

<div class="contentTitle">
Portlet Title
</div>
<div class="contentPanel">
<img src="images/goldengate.jpg" style="float:right;"/>
<span class="header">title</span><br />
Latin Txt
<ul>
<li><a href="#">link 1</a></li>
<li><a href="#">link 2</a></li>
<li><a href="#">link 3</a></li>
</ul>

</div>

Portlets in CSS (1)


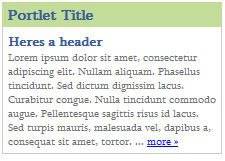
Here is a quick way to make nice little css boxes that look like portlets.

This first one is the simplest as it just has a background-color for the top bar, and a 1 pixel border. Look out for Portlets in CSS (2) which uses a customized background image.

Here is the simple html - it is just 2 divs (Note this particular example is contained in another div with a width of 220px)

<div class="portletTitle">Portlet Title</div>
<div class="portletContent">
<span class="header">Heres a header</span><br>
Latin Text... <a href="#">more »</a>
</div>
</div>

Here is the css
.portletTitle {
background-color:#c3dc9a;
line-height:15px;
font-weight:bold;
color:#395F97;
padding:5px;
}

.portletContent {
color:#6c6d71;
border-left:1px solid #cccccc;
border-right:1px solid #cccccc;
border-bottom:1px solid #cccccc;
padding:5px;
background-color:#ffffff;
font-size:11px;
}

Monday, February 23, 2009

How to Customize lists using css


So the unordered list - ul, by default gives us the standard bullet. This can be easily switched out and replaced by any image you design in photoshop/illustrator.
Applying some styles to the font can really make your list stand out.

Heres an example:
All you do in your html code is give the div an id, and make sure that each li element has the hyperlink reference
<div id="contentPanel">
<ul>
<li><a href="#">1 »</a></li>
<li><a href="#">2 »</a></li>
<li><a href="#">3 »</a></li>
</ul>
</div>

The css is where we take care of things - the lines of note here are bolded: These 2 lines are what is required to indicate you are not using the standard bullet and will be replacing it with a custom image.

.contentPanel {
background-color:#ffffff;
padding:10px;
}

.contentPanel ul {
list-style-type: none;
padding-left:0px;
margin-left:5px;
margin-top:0;
}

.contentPanel li{
background:url(../images/ul-dot.jpg) left no-repeat;
background-position:0 10px;
padding-left:15px;
padding-top:5px;
}

.contentPanel li a{
text-decoration:none;
color:#395F97;
font-weight:bold;
}

.contentPanel li a:hover{
text-decoration:none;
}

The last 2 declarations just take care of the font for the links.

You can get creative for the image, for this one I just used a pencil in photoshop to draw an arrow-like shape.

How to Center Divs using css


Ok, for my first post I'll start of with something really easy that I used to always cheat and use a table for - centering a div with css. Its very straighforward.

Here is the css - the most important line here is the margin:auto line in the background style. See the attached screenshot for how this looks. I actually used this code for a site, so I left the white border in this example as it adds a nice effect.

body {
background-color:#373b44;
color:#650b0b;
margin-top:25px;
}
#background {
width: 800px;
height:520px;
margin: auto;
background-color: #c0c0c0;
border:3px solid #ffffff;
}

The html page just has the call to the class to achieve the effect
div id="background"